![]() One management tool for all smartphones to transfer files between PC & iOS/Android devices.
One management tool for all smartphones to transfer files between PC & iOS/Android devices.

![]() > How-To > Android Backup > How to Backup and Restore Sony Xperia XZ
> How-To > Android Backup > How to Backup and Restore Sony Xperia XZ
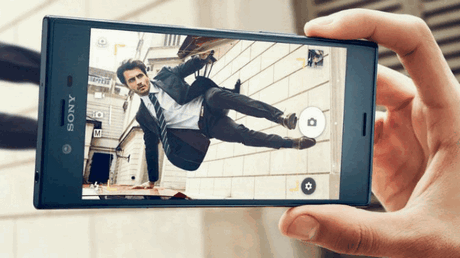
Sony Xperia XZ is a successor to the Xperia X (XZ sounds just like X2, isn't it?) and it's a refresh over the Xperia X Performance. It focuses on a few important key features - design, performance, camera, and battery life. It introduces a new signature design with looped surface kinda like the earlier Lumia phones) and a new signature color to represent the series - Forest Blue.
You can use the Backup and restore application to make backups of Bookmarks, Call log, Contacts, Applications downloaded from Google Play™, Multimedia messages, System settings and Text messages to a memory card or a USB storage device. Such backups can be used to restore your content and some settings in cases where your data gets lost or deleted.
Note: You may incur additional data transmission charges when you restore applications from Google Play™.
 ...
...Note: Remember that any changes you make to your data and settings after you create a backup will get deleted during a restore procedure.
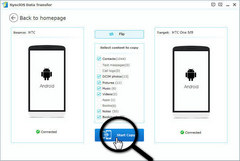
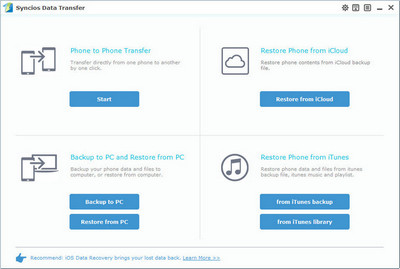
Connect your both your old phone and Sony Xperia XZ to your computer and launch the Syncios Data Transfer (don't forget to enable the USB debugging mode). You will see the main screen shows connecting devices is required.
There are 3 modes: Phone to Phone Transfer, Phone to PC Backup, PC to Mobile Restore. Click the "Start" button under Phone to Phone Transfer mode. Then it will display the the backup list.


It will be just a second before the program recognize them. Make sure your Sony Xperia XZ is on the left side while target device on the right. If not, click "Flip" to exchange the source device and target device.
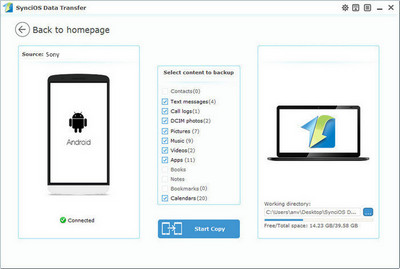
On the middle panel, check data (contacts, text messages, call logs, photos, music, videos, apps, calendars, bookmarks) to transfer from new Sony Xperia XZ to computer or other iOS/Android devices as your will. Press the blue button "Start Copy" and the details will be shown in the interface. After a while, all of conetent will be saved on your Sony Xperia XZ.
Note: You can check the supported contents for Android-to-Android-transfer or iOS-to-Android-transfer here.
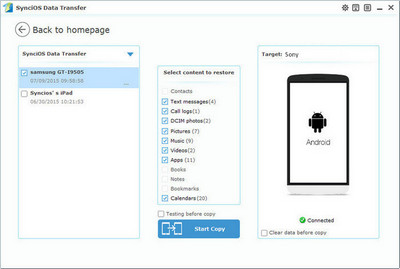
Now you can select your previous backup files from the left panel. Check data you would like to move to your Sony Xperia XZ or other devices on the middle checkbox. Click Start Copy button, all of your selected files will be restored to the target device.
With this powerful Sony Xperia transfer, you can finish the backup task so easily and quickly. There is no need to worry about lost phone data any more. Once you own a new mobile phone/tablet, no matter Apple or another adroid devices, this handy mobile backup tool can also help you transfer data(including contacts, SMS, music, photos, video, call log, etc) directly from phone to phone.
Related Articles