![]() One management tool for all smartphones to transfer files between PC & iOS/Android devices.
One management tool for all smartphones to transfer files between PC & iOS/Android devices.

![]() > Android > How to Manage Photos on Samsung Galaxy S25
> Android > How to Manage Photos on Samsung Galaxy S25
People now put more eyes on camera pixels of their phones these days. Some of them even pay more attention on the pixels rather than the phone performance itself. Some people addicted to post their lives on Instagram or on other social media. They may spend a lot of time on editing their pictures to make it more pretty. And you may be the one of them!! Anyway, a phone with a good camera pixel can definitely save your time. Samsung Galaxy S25 can be a good choice for you, and wonder how to manage your photos on Samsung Galaxy S25? Here are what you need.

To Manage Photos on Samsung Galaxy S25:
Attention: To begin with all the managing operations, you need to download and install Syncios Manager on your computer as your first step. Then connect your Samsung Galaxy S25 to computer via USB cable. Select 'Photos' option on the left panel then wait for the next step.
 For Photo Album
Part 1: Import Photo Album / Photos
Add Photo Album:
Click 'Add' button on the menu bar and select 'Add Folder'. Then you can select the photo album on your computer or from other phones. After choosing your willing click 'OK' to import.

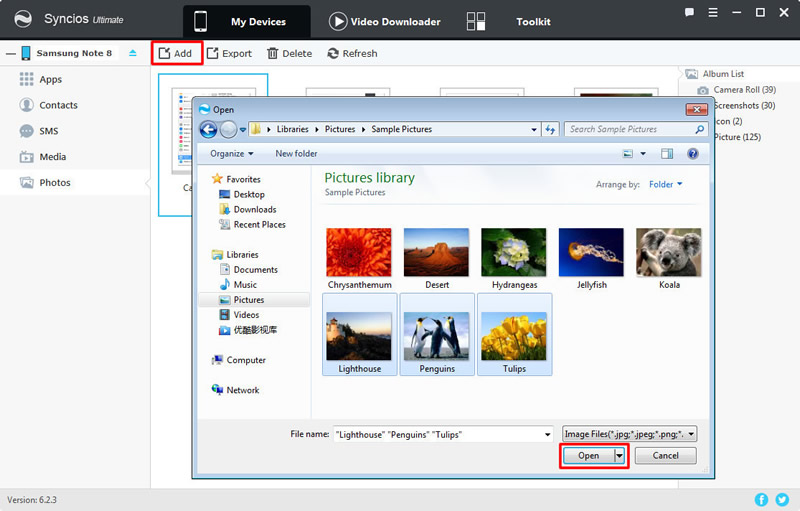
Add Photos:
This time you are gonna choose 'Add File' to import certain photos you'd prefer. Select the specific photos you want and click 'Open' to import. You can select multiple contents if you want.
Part 2: Export Photo Album
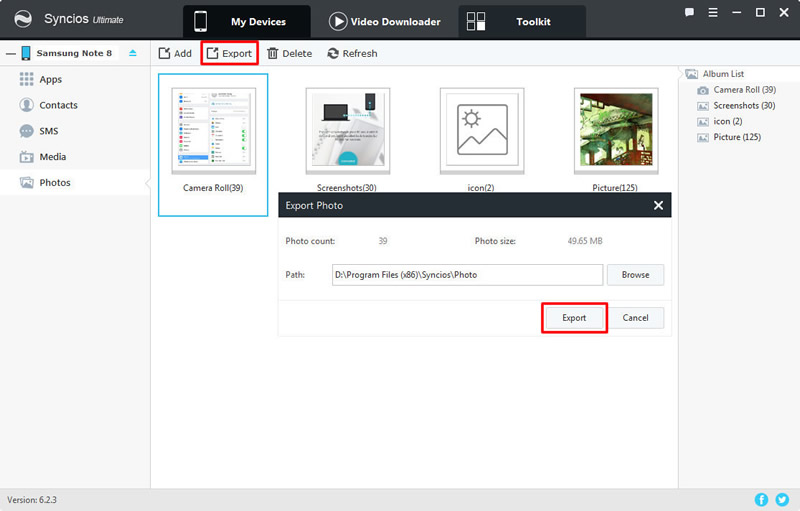
Yep, we have the function to save your whole photo album. Select the photo album you want and click 'Export' on the menu bar. Choose your saving route and click 'Export' in the pop up box.
Part 3: Delete Photo Album
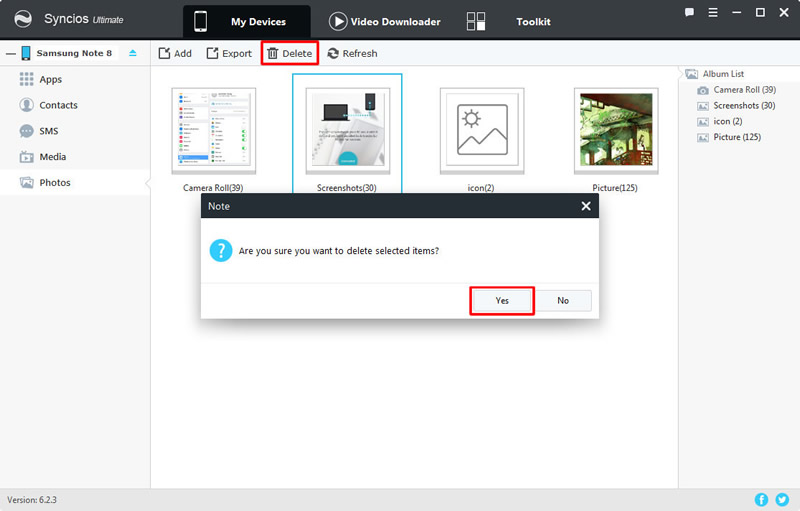
Yes, you can also delete the photo album if you need. Just simply select the certain album and click 'Delete' button on the menu bar. Syncios will ask you again whether you really want to delete the album. Click 'Yes' to submit and your photo album will not exist in your phone anymore.
 For Photos
Part 1: Import Photos
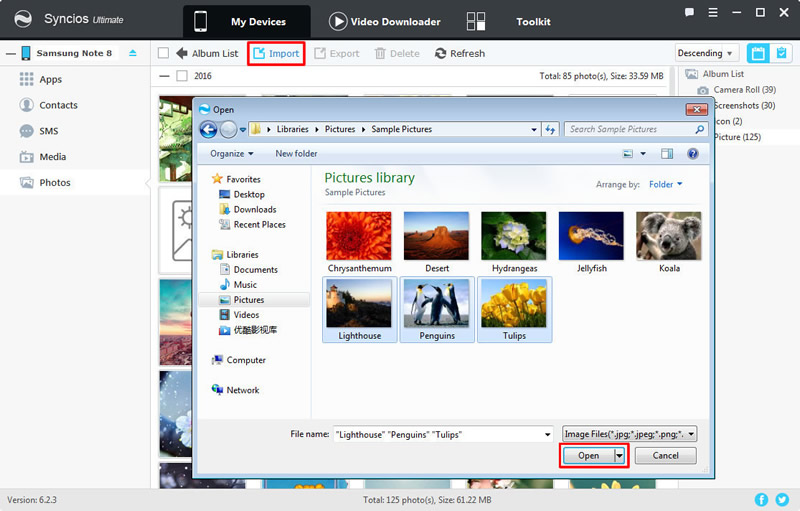
Want to import some photos into specific photo album? Double click the photo album and click 'Import' button in the menu bar. Or you can drag the pictures to the interface directly.
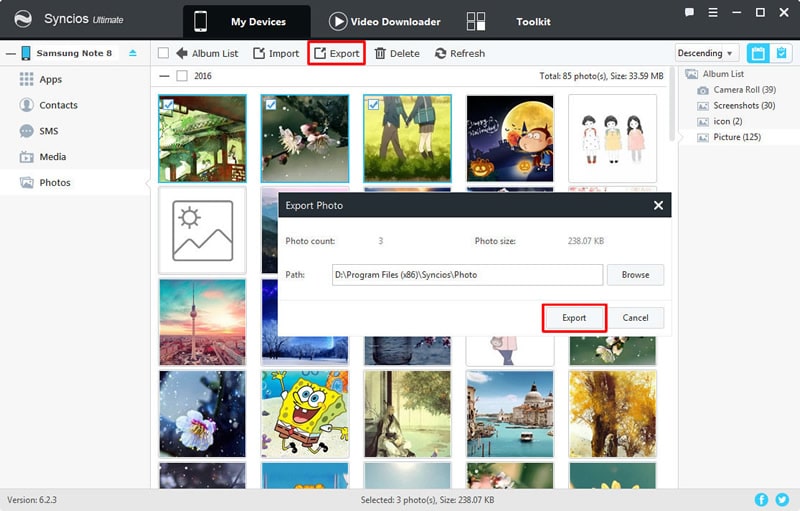
Part 2: Export Photos
If you want to do some operations on certain photos, then you need to double click the certain photo album to enter the folder. Select the certain photos and click 'Export' button on the menu bar. You need to choose your saving route by yourself and click 'Open' to launch the transferring process.
Part 3: Delete Photos
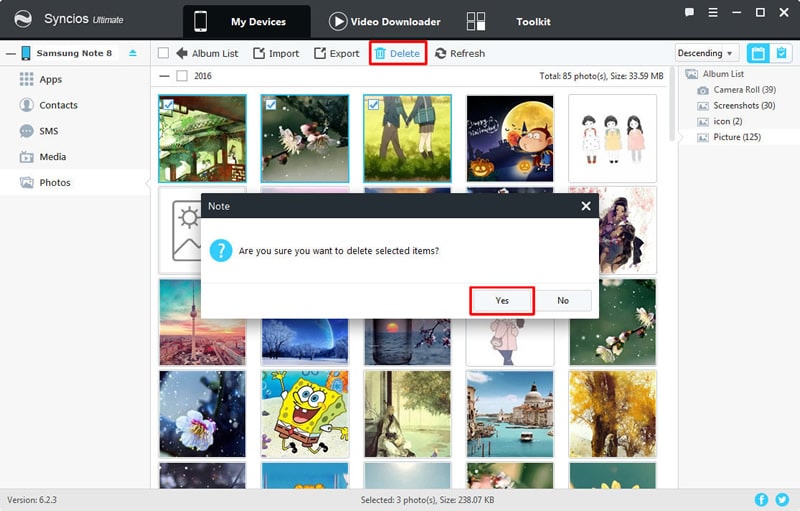
When entering a photo album, simply select the photos and click 'Delete' button on the menu bar. Syncios will ask you again whether you really want to delete these photos. Click 'Yes' to submit and those photos will not exist in your phone anymore.
Samsung |
HTC |
Xiaomi |
Sony |
Oppo |
Lenovo |
Motorola |
Huawei |
Nubia |
Meizu |
Vivo |
LG |
Supported OS: Android 3.0 and above
Supported Files: contacts, messages, apps, music, videos, photos, call logs, bookmarks.