10 Ways to Free up Space on Galaxy S9
With the using your Samsung Galaxy S25 day by day, more and more apps are downloaded, and files like music, video, photos, cache data etc are saved on your Samsung to take up more the space and affect the performance. If you are regularly running out of space and needing to manage it, just take the following ways to free up it for better device maintenance.
- Part 1: Make full use of SD card to save space
- Part 2: Set SD card as default storage on S9
- Part 3: Uninstall any app that you are not using for a long time
- Part 4: Make use of "Device Maintenance" to clean storage
- Part 5: Use the default streaming music service on S9
- Part 6: Effectively manage Samsung contents to free up phone space
- Part 7: Delete files that are stored in the Download folder
- Part 8: Delete browser cache to save space
- Part 9: Save your media files in a cloud storage
- Part 10: Perform a factory reset
 Part 1: Make full use of SD card to save space
The Galaxy S9 and S9+ have a SD card slot to let users choose the extra storage they want to add, even though fewer people will need one because of the high default 64 GB storage internally. It is a great way to free up space and more versatile internal storage by having your photos, music, videos, podcasts, and documents all stored SD card. If you just have a SD card in hand, you can insert it into your Samsung to help you save more storage.
How to Backup Samsung Galaxy S25 to SD Card >>
Moving Apps to SD Card
Moving apps to SD card can help you to free up some space easily. Even though you are not allowed to move most apps or games to the SD card, you can find that some simple apps or assets for apps that don't need to be run on demand stored on the card.
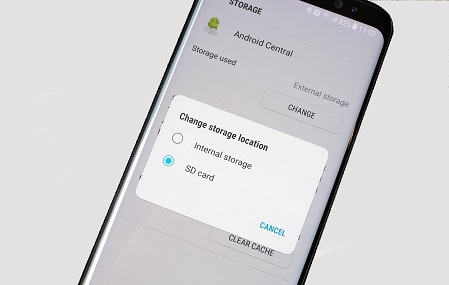
To get started, you'll need to insert your microSD card. Open Settings then scroll down to find Apps. Choose an app you need to move and click on it to enter into App Info. Tap on Storage option then find Change to change the storage location into SD card.
Moving Other Files to SD Card
Except moving app to SD card, you may also want to save some space by moving other files to SD card.
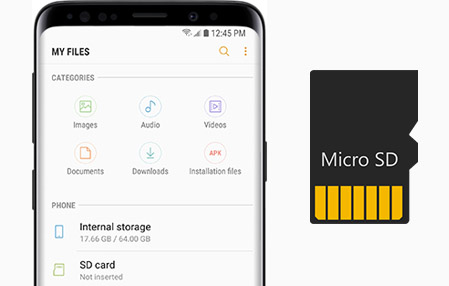
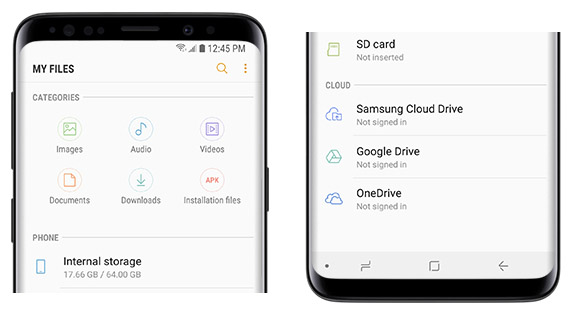
Swipe up or down from the Home screen to access Apps. Touch the Samsung folder, and then touch My Files. Navigate to the file you want to move, and then touch and hold the file. Touch Move or Copy, and then touch SD card. Navigate to the location you want to save your file and then touch DONE.
Part 2: Set SD Card As Default Storage on S9
We are going talk about forcing apps to install over the external memory like SD card instead of utilizing the internal memory on Samsung Galaxy S25/S25 Ultra smartphone. There is a hidden option within the Android operating system that does that job pretty well. If you’re running out of internal memory, it certainly impacts the performance of your phone. The more internal memory you have, the better performance you get. Using an SD card will maintain, and boost the performance of Samsung Galaxy S25/S25 Ultra smartphones. To force installation of all the apps over the SD card (external memory), we’ll enable 'Force allow apps on external' option. This option is available under the hood of Developer Options.
Step 1To force applications to install on the SD card of your Galaxy S9 and S9 Plus, first we have to access the Developer Options. Basically, it panels many useful features that can be used to improve the user experience, and performance of the phone.
Access Samsung Galaxy S25 Developer Options >>
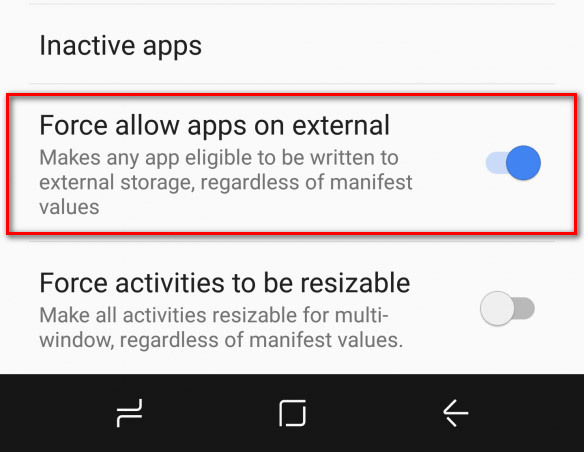
Step 2Once you have enabled the Developer options, you can use the Force allow apps on external option to make the SD card as the default installation path for your application. Open Settings then scroll down to locate Developer Options, tap on it. You'll find Force allow apps on external under this menu.)
(Note: However, for existing apps, you can either reinstall them, or use specific applications to move them to SD card. We suggest you to remove them, and reinstall them.
Step 3Enable Force allow apps on external option and exist Settings, then restart your phone. Now, each application that you install on your Samsung Galaxy S25/S25 Ultra will use the external memory installation purpose.
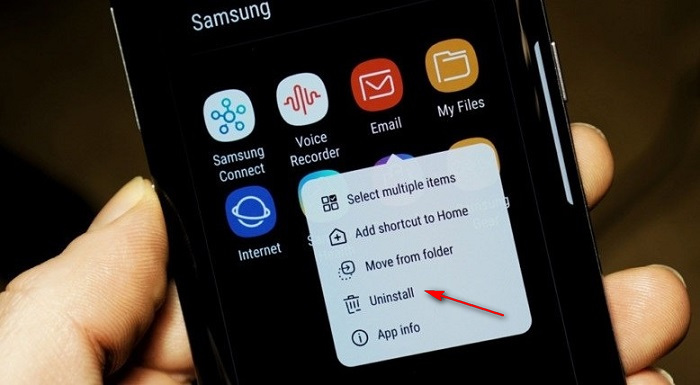
Part 3: Uninstall Any App That You Are Not Using for A Long Time
In fact, you may have not used some apps for a long time, but you keep them on your phone to occupy the space. If you haven't used an app in more than six months, to be exact, chances are you won't be using it any further. Delete unwanted apps to create more space.
Scroll to Settings and click on Apps. Choose from the list of apps displayed according to how much space they occupy, uninstall the biggest ones to clear up space
No need to worry because you can reinstall these apps if you find a need for them in the future. But for now, you will have saved a lot of space by removing apps that you don’t frequently use.
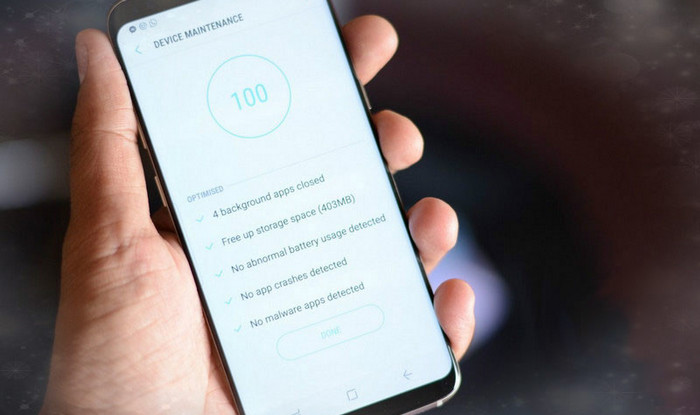
Part 4: Make Use of "Device Maintenance" to Clean Storage
Performing device maintenance on Samsung Galaxy S25 is easy and can be done automatically with a few steps. It manages storage by detecting duplicate files, junk cache files, ads, less used files and asks you to delete them. You just need to clean up all the junk files that are of no use. The memory section also keeps an eye on the background apps and stops them freeing more memory on the RAM.
Step 1 Device Maintenance is a separate section in the Settings menu where you can change the battery profiles, change modes, clean duplicate or cached files in storage, clean memory, and enable security. So go to Settings > Device Maintenance.
Step 2 When the screen loads it will begin to check the device for areas to optimize. Once the check is completed, here is an Optimize Now button on which you can close the background running apps, free up storage by deleting cache files, and it will detect any defects in the system.
Part 5: Use the Default Streaming Music Service on S9
There are a lot of music streaming services out there that you can try out, one of the most popular nowadays is Spotify. You can try this for free but for those who want to listen to specific tracks you need to pay and get their premium account. Besides, there are other free music streaming apps and websites that can offer music for free like Google Play Music and Pandora. The downside with using free apps is having to listen to a lot of sponsored ads in between songs.
Music streaming services will enable you to move all the songs that were previously stored on your smartphone into the online servers of your music streaming provider. By removing the music files, a lot of space can be freed up on your device.
You are allowed to select manually what songs you would want to download and include in your playlist with majority of the streaming apps. Also, you can change the selections on a regular basis. Thus, you only use the Internet for all your music needs and do away music files to free up much needed space on your Galaxy S9.

Part 6: Effectively Manage Samsung Contents to Free up Phone Space
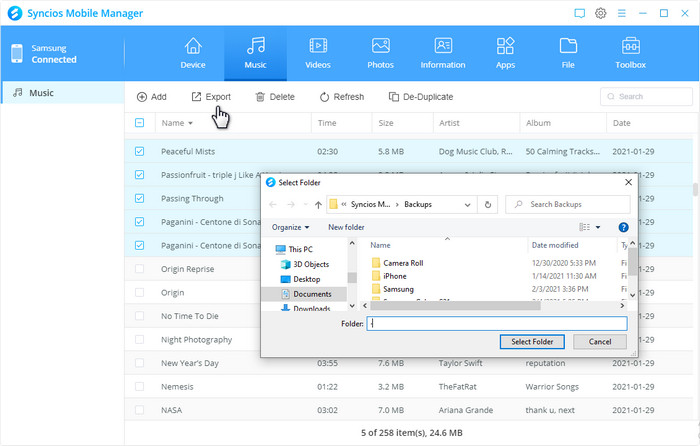
In addition to the ways referred to above, managing your Samsung Galaxy S25 contents is of course one of the most effective ways regarding saving more phone storage. For example, backup or transfer your overloaded contents like contacts, messages, photos, videos, audios, apps etc. to computer, especially some oversized songs, videos and photos. Save some of them to computer and restore them when you need could be a best way to handle it. Syncios Manager is the one you are looking for which is specialized in backup and management mobile phone data, with which you can manage your Samsung S9 internal data even external SD card storage on Samsung S9 with ease.
Step 1 Download Syncios Manager for free and launch it on computer, and connect your phone to computer properly.
Step 2 Hypothetically, when you need to save songs to PC, you find Music from the interface of Syncios. Singly check wanted song(s) and then click on Export button to find a smaller window. Customize a save path and then tap on Select Folder to transfer them to PC.
Step 3 Click on Add to import music files or music folders when you need to restore.
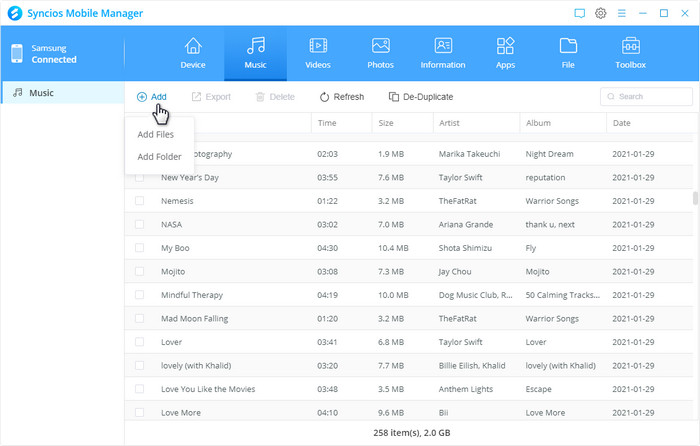
Note: the options will be a little different when backup and restore different contents. The options could be Export/Backup when exporting data. The options could be Import/Add/Restore when importing data.
Part 7: Delete Files That Are Stored in the Download Folder
We all know some file folders will never go away even we've uninstall these apps. Thus, clearing these data manually needs to be done in order to free up space. You have the choice to either connect your smartphone to a PC via USB cable or proceed to delete files manually.
Or you can open Syncios Manager to perform the clearup on computer. Simply tap on File module. You can view file system on your device. Choose operation from Add, Export, New, Delete and Refresh.
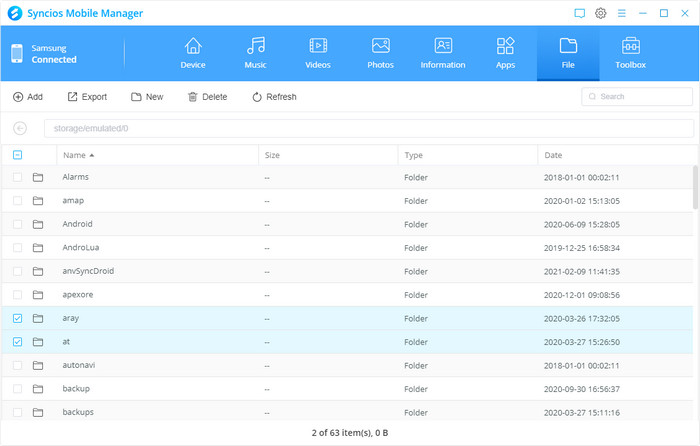
You will be amazed to discover how many files you were keeping in there that was taking up space that you don’t even remember anymore. It is common to have images, APK’s and PDF files stored in there.
Part 8: Delete Browser Cache
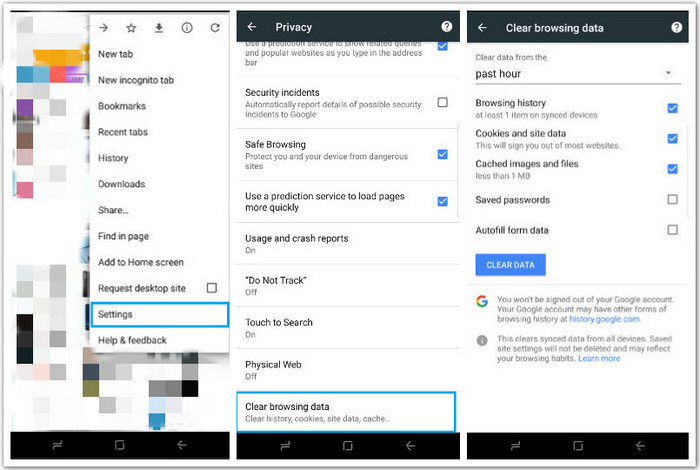
When we load the web pages on browser, there are browsing history, cookies, cached images and files left on our mobile phone. Clearing cached images, cookies, and history is recommended for cleaning up your phone to keep the browser running at optimal speed as well as for addressing privacy concerns. Just start your browser > Menu > More > Setting > Privacy > tap clear browsing data, then choose the data like cached images, files and click CLEAR DATA to delete it.
Part 9: Save Your Media Files in A Cloud Storage
Deleting files may not be a good choice for everyone since phone data is so important within our life now. For iOS users, they may choose to save some data to iCloud for safe. Nevertheless, for Android users, many cloud storage apps are in good use, like Dropbox, Google Photos or Microsoft One Drive.
Step 1 Choose your preferred cloud storage app to use with your Samsung Galaxy S25. Choices can be Dropbox, Google Photos or Microsoft One Drive.
Step 2 Then uploads all photos and videos that you currently have on your smartphone. Once these files are copied you can now proceed to erase these files on your smartphone to free up space on your Galaxy S9.
Part 10: Perform A Factory Reset
An idea comes out when your phone is running slower and slower – you are considering to factory reset your phone, for better operation, for cooler game experience, for more data space or even for privacy protection before giving your phone away. Performing a factory reset on your device will bring it back to its factory defaults possibly erasing all of your important files and data. Thus, you'd best to backup files before proceeding with a factory reset. And make sure all of data could be restored after resetting.
How to Backup and Restore Samsung Galaxy S25/S25+/S25 Ultra with one click >>
Step 1 After backing up all of your Galaxy S9 to computer, here we go to perform a factory reset on Samsung Galaxy S25.
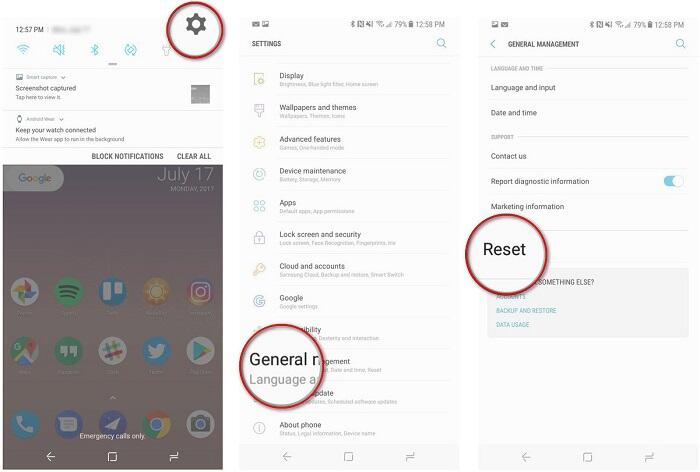
Step 2 Go to Settings on your device. Type Factory data reset in the dedicated search box. Or go to General Management > Reset > Factory data reset.
Step 3 Choose the preferred option. And confirm that you read the warning and you want to go through with the reset. Wait a while for the process to finish.