![]() One management tool for all smartphones to transfer files between PC & iOS/Android devices.
One management tool for all smartphones to transfer files between PC & iOS/Android devices.

![]() > Android >How To Backup and Restore Samsung Galaxy S25
> Android >How To Backup and Restore Samsung Galaxy S25
Samsung Galaxy S25 just unveiled on 23 August 2017 which is the first dual-camera phone of Samsung. What if we lost our phone by accident or our phone is out of storage? The only way we can do is blame ourselves or delete the data to spare some space? It's better for you to backup your phone in advanced just in case you need to restore back one day. Syncios must be your best assistant! Get ready to know it?
3 Tutorial of backup and restore Samsung Galaxy S25:
 Turotial 1. Backup and Restore by using Syncios ManagerTurotial 2. Backup and Restore by using Syncios Data TransferTurotial 3. Syncios Data Transfer restore in other 3 ways -- iCloud backups / iTunes backups / iTunes library
 Tutorial 1: Backup and Restore by using Syncios Manager
What you need to prepare in advance is installed Syncios Manager and Syncios Ultimate both on your Samsung Galaxy S25 and your computer. After installation, connect your Samsung Galaxy S25 via USB cable and start to run (Android detection tutorial). The basic contents of your Samsung Galaxy S25 will appear after Syncios Manager have finished your data synchronization.
|
 Backup Tutorial
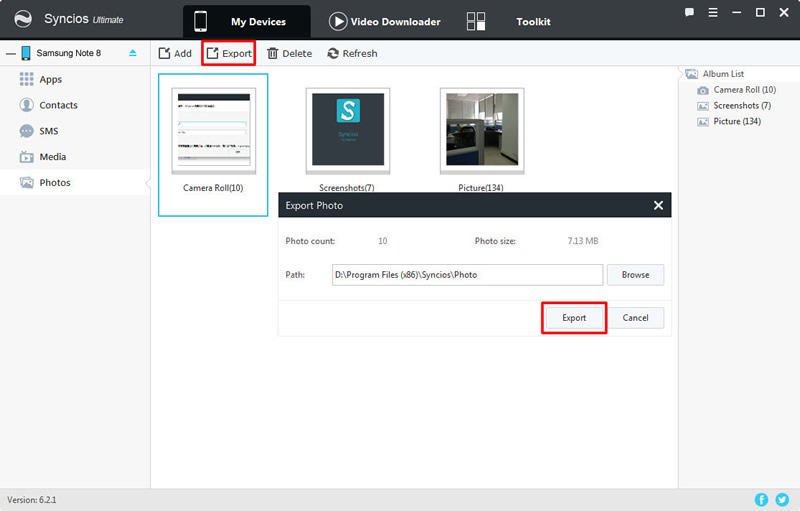
Choose the category in the left panel which includes Apps, Contacts, SMS, Media and Pictures. After choosing, your detailed content of this category will displayed on the main interface. Choose the certain content you want (Folder or multiple single item are available to choose). Click 'Export' and select the saving path of your willing, then click 'Export' to finish all the operations.
|
|
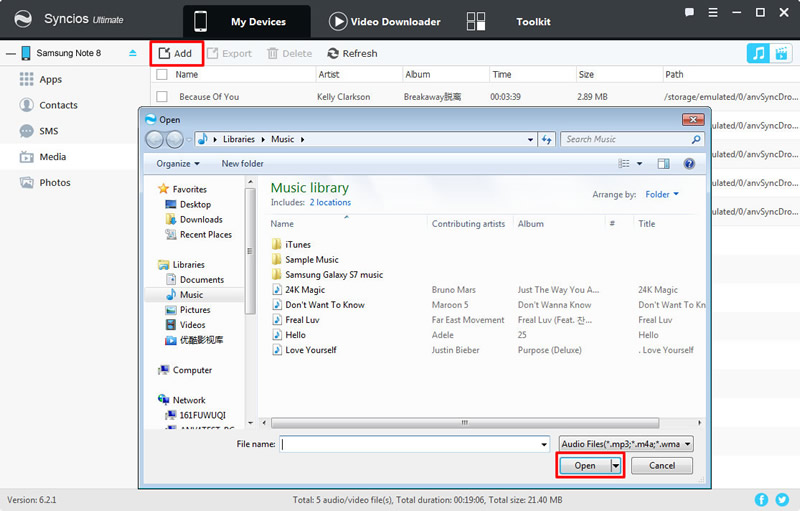
Restore: 'Add File'
Choose the categories as the program shows in the left panel, then Click 'Add' >> 'Add File'. You can select your file from your computer or from any connected device. Of course, the file needs to correspond to the category you've selected.
|
|
|
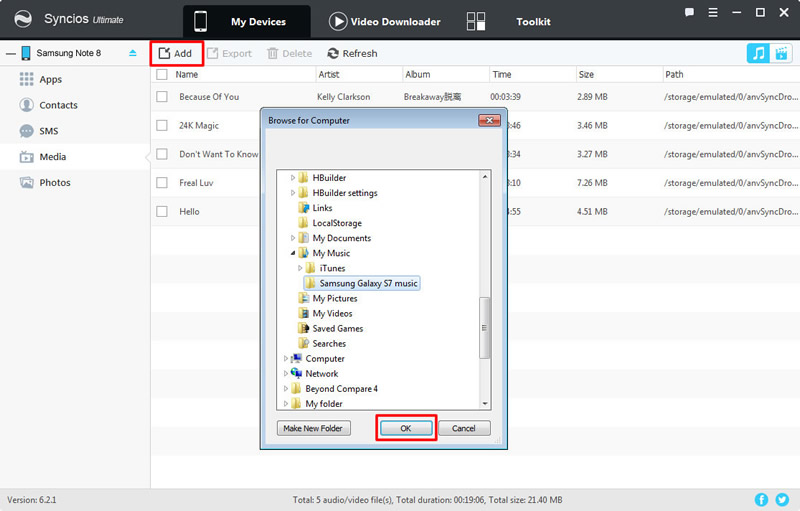
Restore: 'Add Folder'
Choose the categories as the program shows in the left panel, then Click 'Add' >> 'Add Folder'. You can select the whole folder from your computer or from any connected device to import. Certainly, the folder needs to correspond to the category you've selected.
|
Tutorial 2: Backup and Restore by using Syncios Data Transfer
For the first step to start your 'One click' backup and restore, you should install Syncios Manager and Syncios Data Transfer both on your Samsung Galaxy S25 and your computer. After installation, four main functions will appear on the screen, select the willing function you want then connect your Samsung Galaxy S25 via USB cable (Android detection tutorials) or using Wi-Fi(Your phone and computer must access to the same network) and start to run.
|
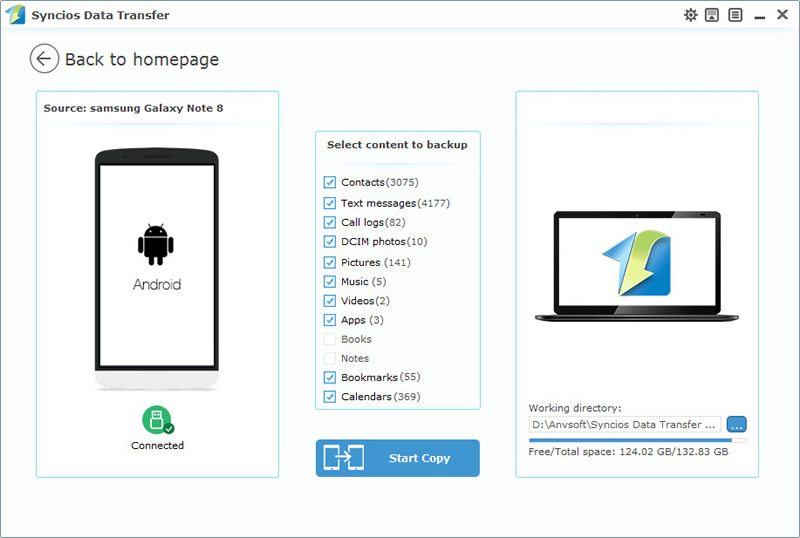
Backup Note 8
Select 'Backup to PC'.
Once the system complete synchronization, the option box of the item which could be backing up will be available to click. Select the options and choose the saving path you want. Finally, click 'Start Copy' and wait till complete. |
|
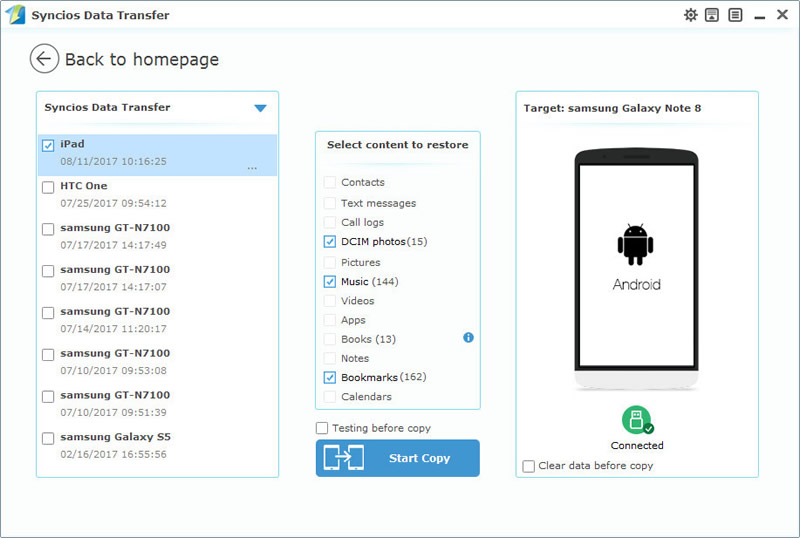
Restore Note 8
Select 'Restore from PC'.
Once the system complete synchronization, all the backups you have made previously will shown on the left panel ordered by the time line, you can select the specific backup file you want to restore to your Samsung Galaxy S25, then click 'Start Copy' and wait till complete. |
|
Tutorial 3: Syncios Data Transfer restore in other 3 ways
Syncios Data Transfer can not only restore the backups made by itself but also can restore your backups from iCloud and iTunes. Detailed tutorial is showing below. We will present the recovering tutorial forms in the order of iCloud backup file, iTunes backup file and iTunes playlist/music.
|
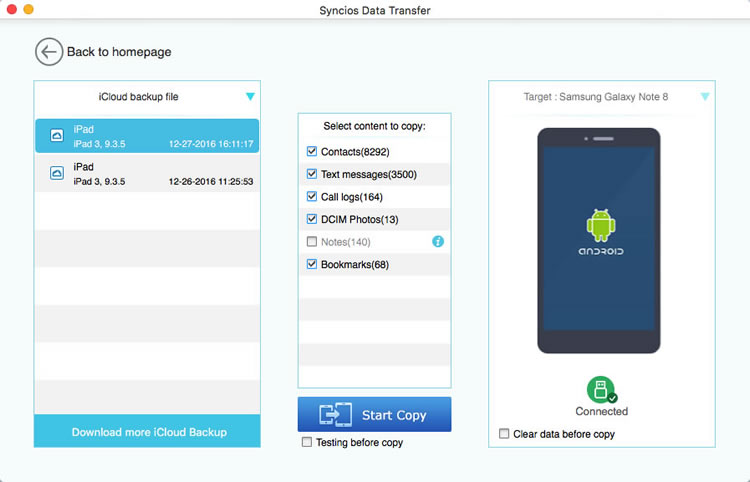
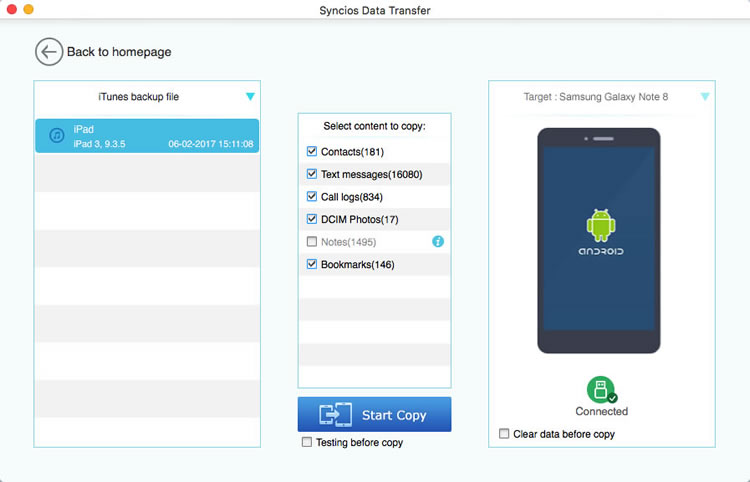
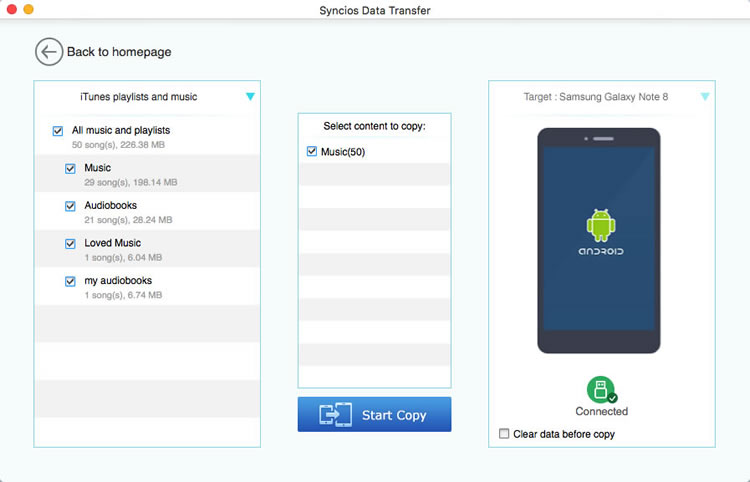
iCloud/iTunes backup file, iTunes playlists and music
Select the restore mode you want, then choose the certain backups you've made before. You can find out your willing backups according to the time line. Choose the contents of the backups and click 'Start Copy'. It may take some time for big data transferring. After a few minutes, your backups will transfer to your Samsung Galaxy S25.
|
|
|
Samsung |
HTC |
Xiaomi |
Sony |
Oppo |
Lenovo |
Motorola |
Huawei |
Nubia |
Meizu |
Vivo |
LG |
Supported OS: Android 3.0 and above
Supported Files: contacts, messages, apps, music, videos, photos.