![]() One management tool for all smartphones to transfer files between PC & iOS/Android devices.
One management tool for all smartphones to transfer files between PC & iOS/Android devices.

![]() > Android >Transfer Photos from Huawei Mate 70 to Computer
> Android >Transfer Photos from Huawei Mate 70 to Computer
Huawei once again partnered with Leica to engineer the dual-lens camera in the Mate 10 series. The camera is a 12 MP RGB sensor with a f/1.6 aperture, along with a monochrome 20 MP sensor. The RGB camera is supported by optical image stabilization. Due to this dual-lens camera setup, the camera is capable of taking bokeh shots. If you are searching for a method of how to transfer your amazing photos pictured by Huawei Mate 70, then our article is going to help you fix your problem.
 Transfer the photo of your choice
Step 1: Install and connect Huawei Mate 70, Select 'Photos' option
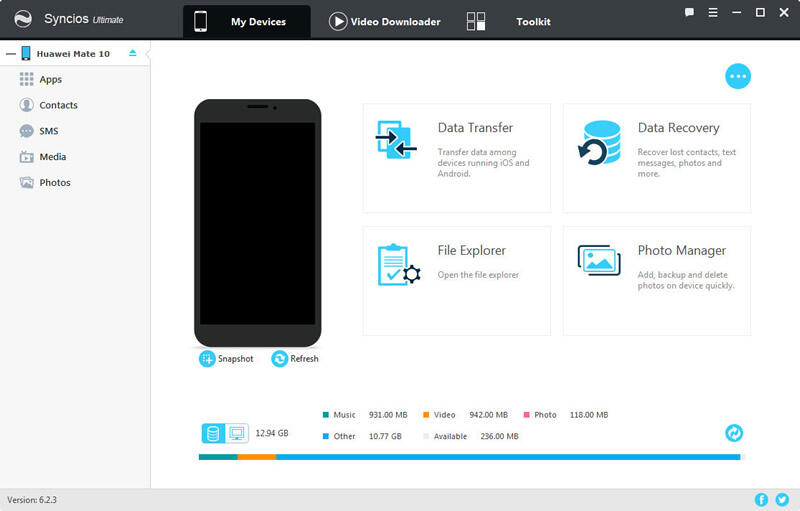
Please download and install Syncios Manager on your computer in advanced. Then connect your Huawei Mate 70 to computer. Once Syncios succeed in sync your phone, the main information of your phone will displayed on the interface. Select 'Photos' option on the left panel and wait for sync. If you encounter any detection problem during the process, please click here.
Step 2[1]: Transfer photo album
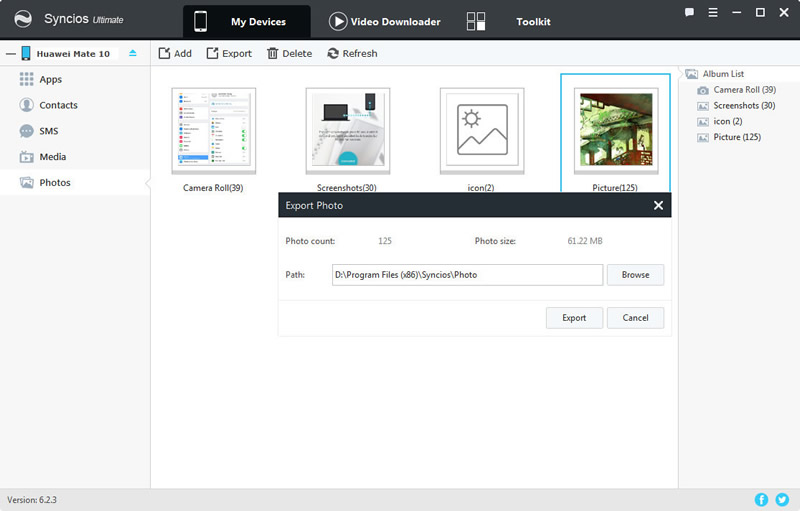
The album list of your phone will all display on the interface. Choose the certain photo album you would like to backup and click 'Export' button on the menu bar. You can also select your saving path, then click 'Export' to launch the transferring process.
Step 2[2]: Transfer photo file
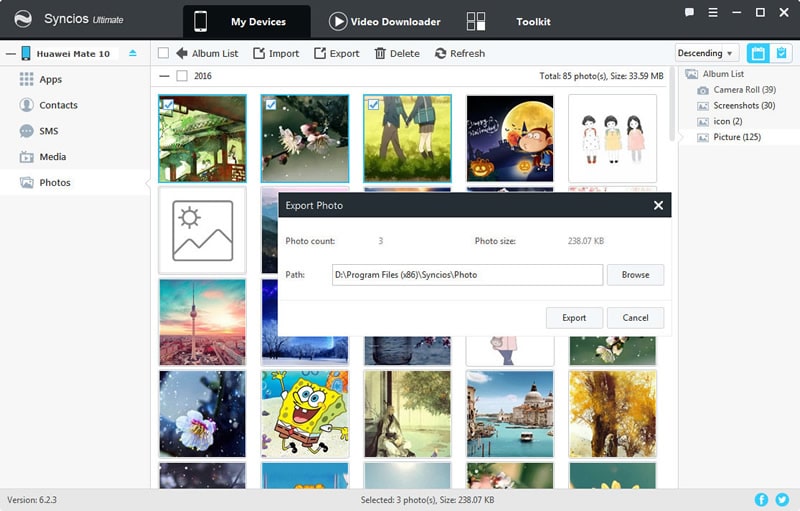
If you want to transfer the certain photo, Double click the photo album and choose the certain photo you want. Do the same operations as step 2[1]. Multiple files are supported to transfer.
 Transfer all your photos in 1-click
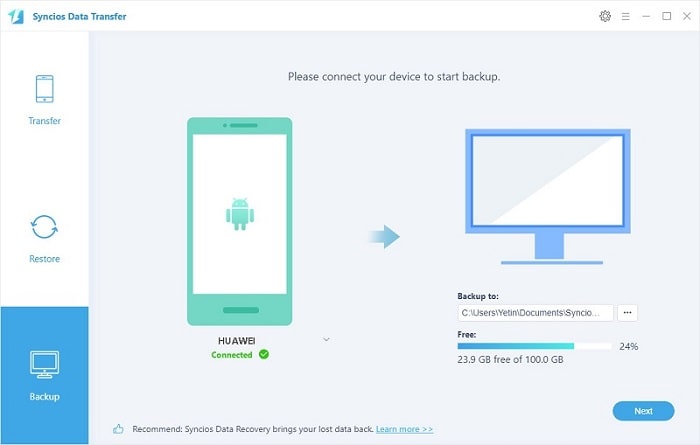
Step 1: Install and Launch, choose 'Backup to PC' and connect Huawei Mate 70
Please download and install Syncios Data Transfer on your computer in advanced. Then launch Syncios Data Transfer.
Download
Win Version
Download
Mac Version
Three main functions will show on the interface, they are 'Transfer', 'Restore', 'Backup'. Choose 'Backup' module in the interface then connect your Huawei Mate 70 to computer through USB cable or using Wi-Fi. (If you encounter any detection problem during the process, please click here. Tips: Huawei Mate 70 and computer must access to the same network when using Wi-Fi to connect.)
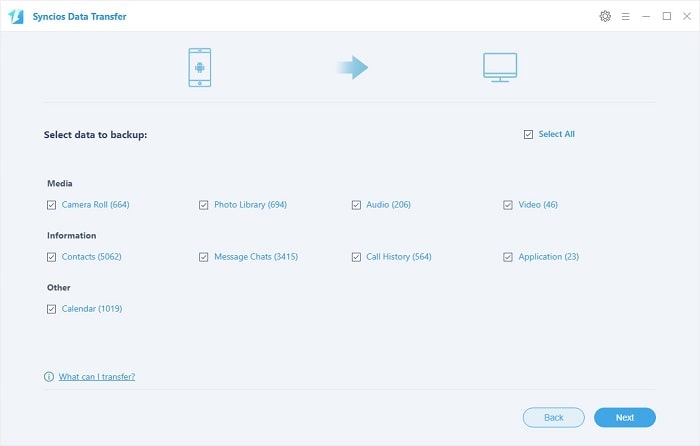
Step 2: Export File
Once Syncios Data Transfer has finished to synchronize your Huawei Mate 70, the main contents of your phone will all show in the middle. Select 'Camera Roll' and 'Photo Library' to transfer. Also, don't forget to select your saving path in advanced. Click 'Next' and wait till complete.
 Download from Huawei Cloud
Tips: Huawei provides every customer free cloud storage called HiCloud, almost 176 GB storage available if you don't pay for more. You can go to the Settings to allow your phone upload the photos and pictures to HiCloud automatically if your Huawei Mate 70 connected to WiFi networks.

Supported Huawei devices:
|
|
Huawei Mate 70/10/9/8/7, Huawei Pura80/10/9/8/7, Huawei Honor 7/8/9, Huawei 6P, Ascend X, Honor, Vision, Sonic, Boulder, IDEOS X3/X5, Huawei Ascend G6/P6/Y200/Y300/P1/P2/Mate/D1/D2/G300/G600 and all Android devices |
Supported OS: Android 3.0 and above
Supported Files: Contacts, Text messages, Call logs, DCIM photos, Pictures, Music, Videos, Apps, Bookmarks