


Top 6 Solutions to Fix iTunes Error 1667
 About iTunes Error 1667
The 1667 error can appear during program installation, while a Apple Inc.-related software program (eg. iTunes) is running, during Windows startup or shutdown, or even during the installation of the Windows operating system. Keeping track of when and where your 1667 error occurs is a critical piece of information in troubleshooting the problem. You can check the causes of iTunes error 1667 below:
- iTunes is not installed correctly.
- Interruption of USB connection due to damaged ports, faulty cable, etc.
- Corrupt download or incomplete installation of iTunes software.
- Corruption in Windows registry from a recent iTunes-related software change (install or uninstall).
- Virus or malware infection that has corrupted Windows system files or iTunes-related program files.
- Another program maliciously or mistakenly deleted iTunes-related files.
 How to Fix iTunes Error 1667
Solution 1. Check USB Cable/Port/Connector
One of the first things you can try is to change the USB port where the cable connects. You’d be surprised at how randomly this fixes all hiccups when trying to upgrade/update the firmware. The USB cable could be faulty, if you happen to use a cable that did not come with your device. Make sure that the USB cable is certified and authentic - best if it was from Apple. Here are the steps to ensure the USB cable connection is okay.
Step 1: Ensure the original USB cable is used. You could also try a standard Apple USB cable.
Step 2: Check the cable connection from the iPhone to the computer or vice versa. Ensure there are no loose connections and all cables are properly plugged in.
Step 3: Unplug the cable that connects to your iPhone from the USB port on your computer, and then reconnect it. Do the same from your iOS device.
Step 4: Ensure the USB cable is directly connected to the port on the phone. If necessary, try to remove any third-party battery packs or cases.

Solution 2. Free Up Space
If the error shows up when you are upgrading to latest iOS, then it indicates that your iPhone/iPad is running above the storage capacity it has. Therefore, back up the data, which you immediately do not need and then delete it off your device. You can either back up through iTunes to your PC or Mac or save it all to your iCloud account as desired. If needed, buy more storage and then do the needful. When done taking data backup, free up the space. Afterwards, retry the update to new iOS and it should go through without error.
![]() Learn more about how to free up space on iPhone/iPad.
Learn more about how to free up space on iPhone/iPad.
Solution 3. Update iTunes to Latest Version
It is always advisable to all the users that the iTunes must be of latest version that helps avoiding these kinds of glitches. Hence, make sure that you’ve the recent version and if you don’t have it, install now and come out of the trouble. To install, follow the instructions below.
(1) To update iTunes on windows computer:
Step 1: Open iTunes.
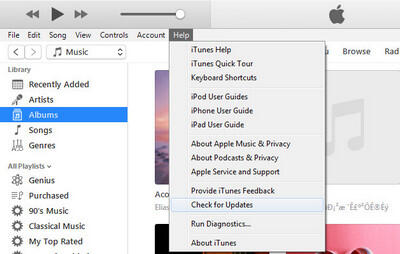
Step 2: From the menu bar at the top of the iTunes window, choose Help > Check for Updates.
Step 3: Follow the prompts to install the latest version.
Step 4: Or you can directly download the latest version from here.
(2) To update iTunes on Mac computer:
Step 1: Open the App Store on your Mac.
Step 2: Click Updates at the top of the window.
Step 3: If any macOS or iTunes updates are available, click Install.
Solution 4. Reboot Your iPhone/iPad
iTunes error related to software issue like software crash can be resolved by this method. Press and hold the Sleep/wake button and the Home/Volume button at the same time. Keep holding the buttons at least 10 seconds and release the buttons when the Apple logo appears. After that, try to charge your iPhone again.
Resetting your iPhone 6s and earlier, iPad, or iPod touch: Press and hold both the Home and Top (or Side) buttons for at least 10 seconds, until you see the Apple logo.
Resetting your iPhone 7 or iPhone 7 Plus: Press and hold both the Side and Volume Down buttons for at least 10 seconds, until you see the Apple logo.
Resetting your iPhone X, iPhone 8, or iPhone 8 Plus: Press and quickly release the Volume Up button. Press and quickly release the Volume Down button. Then, press and hold the Side button until you see the Apple logo.

Solution 5. Hard Reset Your iPhone/iPad
It’s worth mentioning again that a hard reset will totally erase all the content from your iPhone. So if you still have any contacts, photos, or anything that you want to back up, please do it before following the steps below.
Part 1: Hard Reset Directly from the iPhone
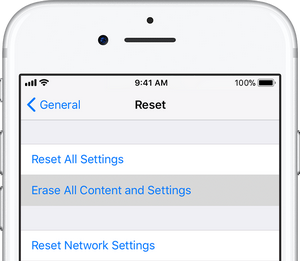
Step 1: Go to Settings. Tap General.
Step 2: Scroll to the very bottom and tap Reset.
Step 3: Tap Erase All Content and Settings.
Step 4: Tap Erase iPhone. iTunes will then begin restoring the phone to its original factory state.
Step 5: After the process is complete, your iPhone will restart and you’ll be presented with the “Slide to set up” welcome screen, just like when you turned on your iPhone for the first time.
Part 2: Hard Reset Using iTunes on Your Computer
Step 1: Open iTunes on your Mac or PC.
Step 2: Connect your iPhone, iPad, or iPod to your computer with the cable that came with your device.
Step 3: If a message asks for your device passcode or to Trust This Computer, follow the onscreen steps.
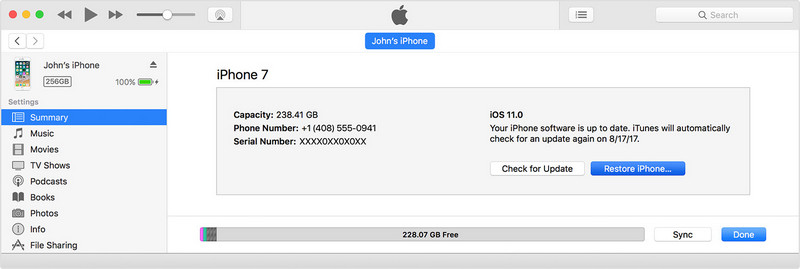
Step 4: Select your iPhone, iPad, or iPod when it appears in iTunes.
Step 5: In the Summary panel, click Restore [device].
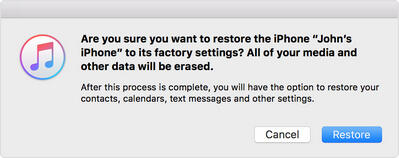
Step 6: Click Restore again to confirm. Then iTunes erases your device and installs the latest iOS or iPod software.
Solution 6. Use iTunes Alternative Tool
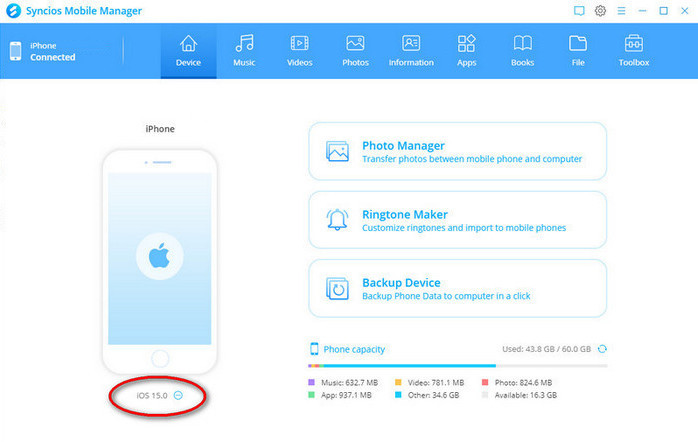
iTunes could be kind of irritating while doing iPhone/iPad/iPod data transfer and backing up/ restoring data. Fortunately, there is an third-party tool, like Syncios Mobile Manager , which helps you transfer music, videos, photos, contacts, messages, etc between iPhone/iPad/iPod and computer easily. With this utility mobile assistant, you are able to backup & restore everything on your iPhone with only one click, manage music, playlist, make ringtone.
- Support OS: Mac OS X; Windows
 Why do we choose Syncios iTunes Alternative?
- Benefit 1 . Syncios Manager is a powerful iTunes alternative and iOS manager, trusted by millions Apple users. If budget is always your first consideration, why don't you give this a shot?
- Benefit 2 . As an iPhone/iPad/iPod synchronizer, Syncios Manager helps users to transfer more than 12 data between iOS device and computer or Mac efficiently, including : music, video, photo, eBook, contacts, notes , messages, and more. You can do regular backup freely and don't have to worry about data loss.
- Benefit 3 . As a multifunctional iPhone Manager, it allows you to make your own ringtones with several clicks.
- Benefit 4 . Syncios Mobile Manager also comes with some useful toolkit, including One Click backup, One click recovery, HEIC Converter, Photos Compression, which make your digital life more colorful.
Conclusion
This tutorial provides 6 effective solutions to fix iTunes error 1667. You could fix your issue easily with the instructions of this post. If this guide helps, don't forget to share it with your friends.