How to Enable USB Debugging on Nokia
 What is USB Debugging Mode?
If you use an Android phone and you’ve searched forums for solutions to problems, you’ve probably heard the term "USB Debugging" every once in a while. You may even have seen it while looking through your phone’s settings. It sounds like a high-tech option, but it really isn’t; it’s quite simple and useful.
USB Debugging Mode is one thing that you cannot skip to know if you are an Android user. The primary function of this mode is to facilitate a connection between an Android device and a computer with Android SDK (Software Development Kit). So it can be enabled in Android after connecting the device directly to a computer via USB.
What is USB Debugging Mode?
USB Debugging grants you a level of access to your device. This level of access is important when you need system-level clearance, such as when coding a new app. It also gives you much more freedom of control over your device. For example, with Android SDK, you gain direct access to your phone through your computer and that allows you to do things or run terminal commands with ADB. These terminal commands can help you restore a bricked phone. You are also able to use some third-party tools to better manage your phone (for example, Syncios Mobile Transfer). So this mode is a useful tool for any adventurous Android owner.
Enable Developer Options on Nokia
Developer options can be used by application developers when testing applications. Sometimes, you may also need to activate USB Debugging.
I’ll share some simple steps that enable Developer options and USB Debugging Mode on Nokia.
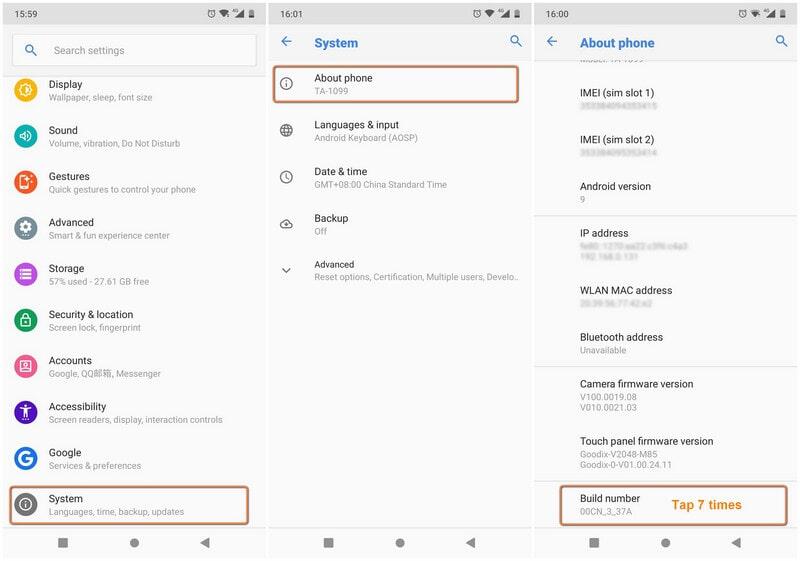
Step 1Unlock your phone and go to main Settings, click "System".
Step 2 Under settings, head onto "About phone" option and tap on it.
Step 3 Under About phone, scroll down to bottom and tap on "Build number" 7 times until you see "You are now a developer!"
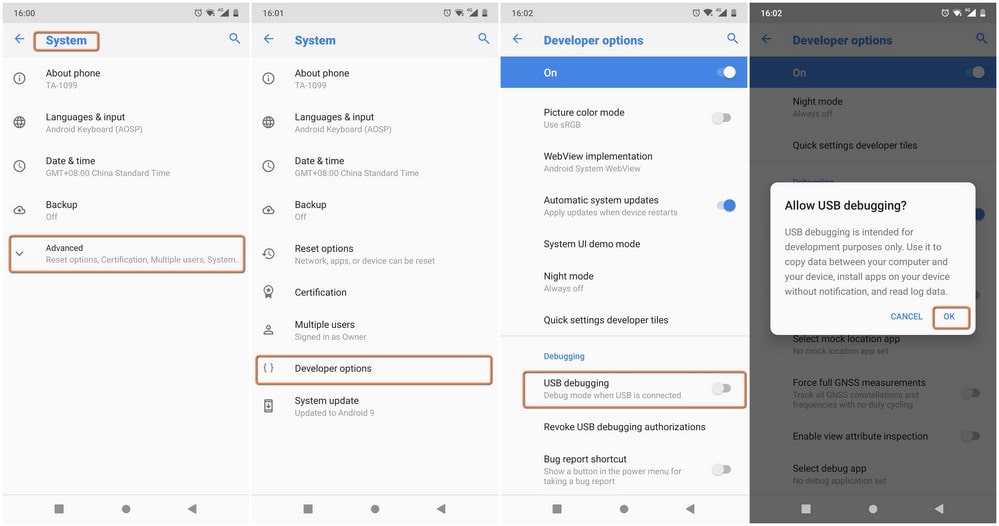
Step 4Go back to System, find Advanced.
Step 5Scroll down and tap on "Developer options".
Step 6Scroll down to find USB Debugging option and enable it.
One-Click backup and restore Nokia phone on computer
As you can see, we mentioned clear steps on enabling the Debugging mode on your Nokia phones. Now, you have successfully enabled USB Debugging on your Nokia once and forever. By doing that, you can easily to connect your phone to any 3-party program on computer. Syncios Data Transfer, for example, can give you options to transfer the data from your Nokia to computer, as well as data transfer to other phone, as well as fully backup and restore your Nokia phone.
Nokia Backup and Restore Tool
- One-click backup and restore Nokia data in lossless quality.
- Multiple OS supported: multiple phones run Android and iOS.
- Recover iTunes/iCloud backup to iOS or Android devices
- Sync contents from iTunes Library to PC and devices.
- Backup mobile phone data to computer and restore in any time.
Step 1Download and install Syncios Data Transfer on your computer. Then launch it to start the backup and restore process.
Step 2Enable the USB debugging mode on your Nokia phone, and then connect it to the computer port with a USB cable. There will pop up a Syncios Apk on the Nokia phone screen to show the connect states on the whole process.
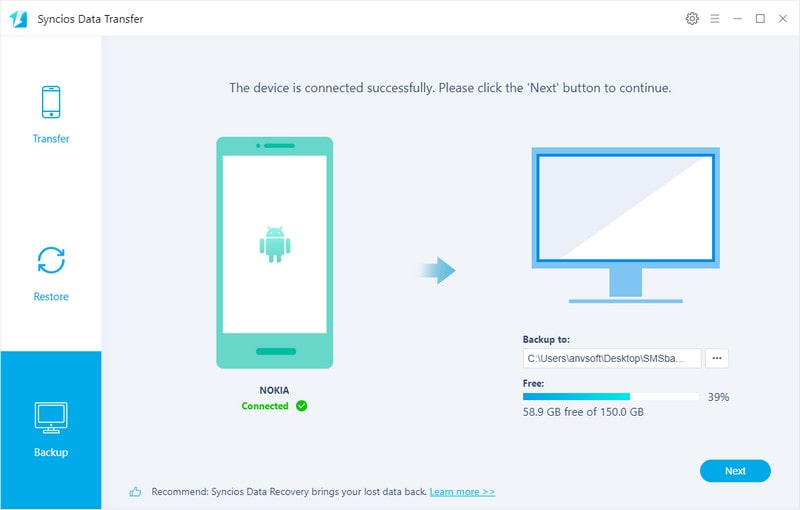
Step 3On Syncios Data Transfer, go to Backup mode where you can see a phone and computer icon. On the left, please successfully connect Syncios to your Nokia phone. On the right, tap the 3 dots to customize a path on your computer, which will then decide where you store the Nokia data backup.
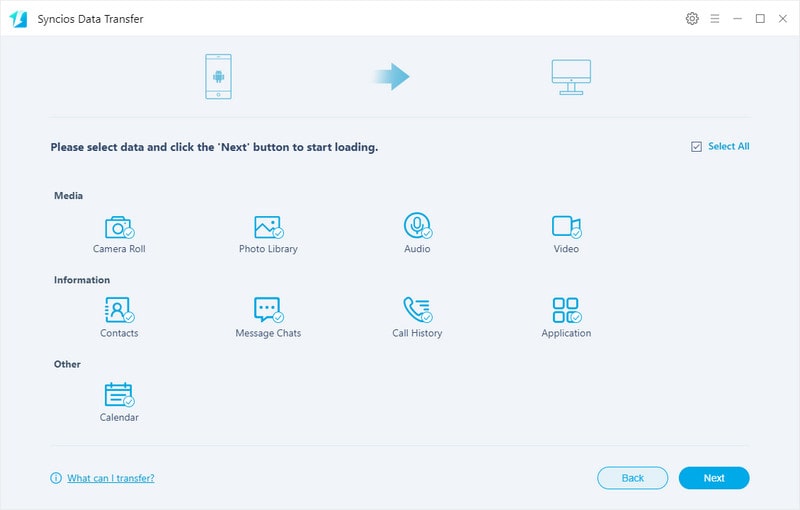
Step 4Following, tap the Next button. You now select which data on your Nokia to backup to computer. You can individually select Camera Roll, Photo Library, Audio, Video, Contacts, Messages Chats, Call History, Application and Calendar to transfer. Or you can have a direct tap on Select All to sync all these data to computer. Then again a tap on Next to proceed the Nokia and computer synchronization.
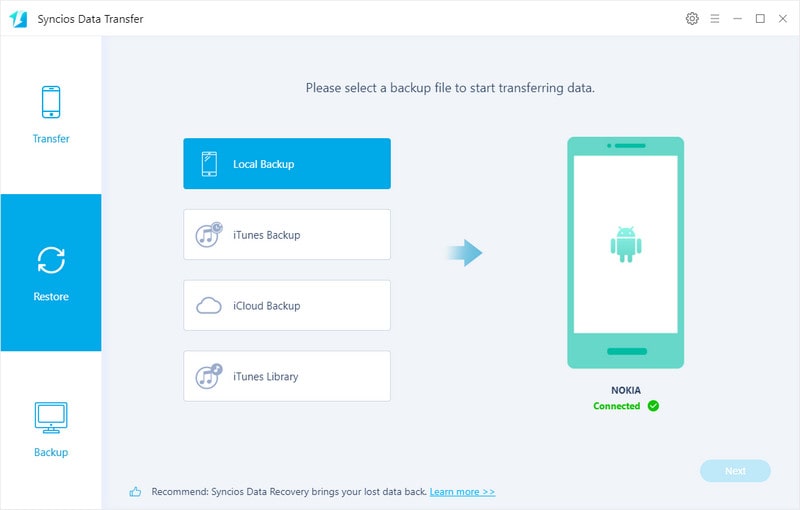
Step 5And to restore the backup to your Nokia, you can the same use Syncios Data Transfer to work it out. Go to Restore and click on the Local Backup where you can straightly navigate to the PC local backup and restore your previous backup file to your target phone. Both iOS and Android phone are fully compatible with.
Summary
See, what a convenient tool that you can take to fully backup and restore your Nokia data. All you need to do is to enable your Nokia Debugging mode and cooperate with Syncios Data Transfer. All your data will be safely backed up and restored without data loss.
What's next? Download Nokia Data Transfer now!


Related Articles
Related Solutions
Remove iPhone screen passcode, Apple ID, Face ID, and more in minutes.