

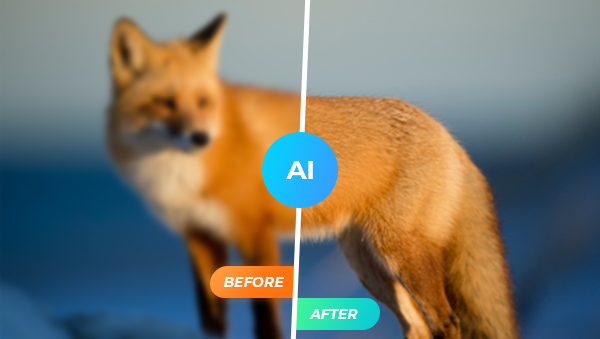
How to Use AI Image Sharpening to Fix Blurry or Out-focus Images
With the emergence of Artificial Intelligence (AI) image sharpening tools, photographers and designers can now bring their photos to life with minimal effort. AI technology has made it possible to take a blurry, dull photo and transform it into a clear and vibrant masterpiece. Whether you’re an amateur photographer or a professional designer, AI image sharpening tools offer an easy and efficient way to enhance your photos. Not only do these tools enable you to sharpen and improve the clarity of your photos, but they also allow you to make subtle adjustments to the contrast, color, and texture of your images. With AI image sharpening tools, you can easily transform a dull and lifeless photo into a stunning work of art. This guide will provide you with a comprehensive overview of how to use AI image sharpening to fix your blurry images and create professional-level quality images.
Part1: Frequently Asked Questions About AI Image Sharpening
1. What is AI Image sharpening mainly used for?
AI Image sharpening is mainly used for improving the clarity, precision, and accuracy of digital images. It can be used to enhance details in an image, such as adding definition to edges or accentuating texture. AI image sharpening can also help reduce noise and blurriness, improve contrast and saturation, and create a more realistic-looking photo. Additionally, it can be used to correct over- or under-exposure problems in photos, or even make certain elements of an image pop out from the background.
AI image sharpening is also being used in medical imaging, satellite imagery, and other fields where precision and clarity are essential. With its growing popularity and increasing availability, AI image sharpening is sure to be a major part of the future of photography.
2. Is AI image sharpening worth it?
For people who have such kind of need, the answer is absolute yes. When it comes to image sharpening, AI has recently proven to be a very effective tool. It has many advantages over traditional image editors that are not available. For example, saving time and money, with no requirement on professional photo edit knowledge.
3. Is AI image sharpening better than Photoshop?
It depends. Foremost, it can be determined that using AI technology to sharpen pictures has advantages that Photoshop sharpening does not have. Especially for those who have no knowledge of image editing, the various parameters in Photoshop can be confusing. But Photoshop as the ace in the image editors of course has its own advantages, that is, those who are skilled in Photoshop will have more freedom to create images as they wish.
Part2: Tutorials on Using AI Image Sharpening to Fix Blurry Images?
AI sharpening technology is getting more and more mature, and various AI image-sharpening tools have emerged on the market. However, not each of them is so experienced and stable. However, AVC.AI can be considered one of the best ones.
Trained on millions of images of different types, AVC.AI enables you to sharpen kinds of images including portraits, wildlife, animes, landscapes, architecture, and more. Since it is an online AI sharpener, you don’t have to download any program. With just a few clicks, you can get a clear, crisp image easily.
Steps to Sharpen your Blurry Images with AVC.AI
Step 1: Visit AVC.AI
Visit AVC.AI with any browser you like and click Login/Sign Up to log into your account. If you are new to this online sharpener, you will get some free credits after your first login. (Click here to visit its desktop version)
Step 2: Upload the Image
Click the Upload Image button or drag and drop one or more images that need to be sharpened. Currently supported input formats are *.png, *.jpg, *.jpeg, *.bmp, *.jfif, and *.webp.

Step 3: Select AI Models and Start Processing
There are six AI features in total. Select the proper one based on your need. Here you may select the Upscale model. It is recommended to turn on Face Refinement when sharpening portraits. If you want to enlarge the image at the same time, select the corresponding upscaling scale. If not, check the box to keep the original size at 100%.
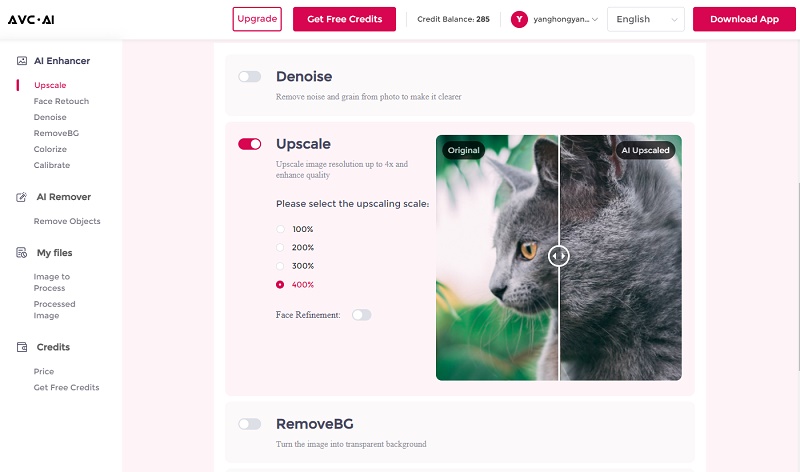
After selecting the images and models, click on the Start Processing button to start sharpening blurry images.
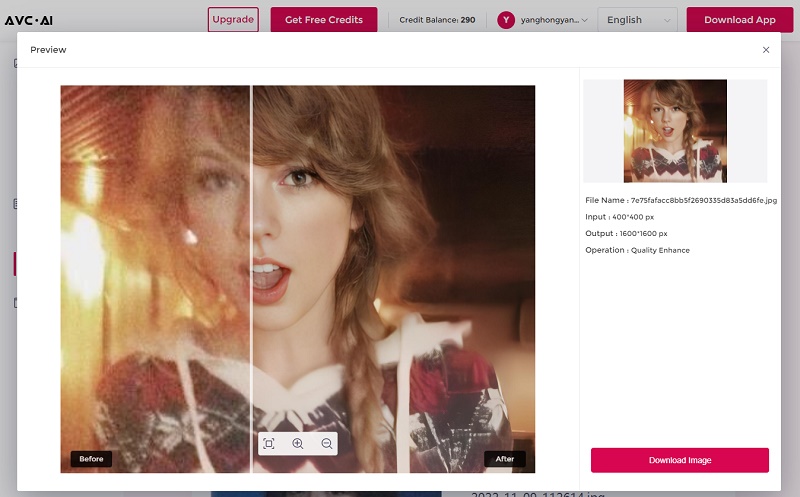
Step 4: Preview and Download Images
Image processing will be done within seconds. When it is finished, you can click the Eye button to preview the results. Finally, click Download Image to save the processed photo.
Note: Remember to download the processed images in time, since they will be deleted after 72 hours for your privacy.
Finals Words
AI image sharpening technology is becoming increasingly popular among both professional photographers and image editing novices due to its powerful results and ease of use. By taking advantage of this technology, people are able to take their images to the next level with stunning detail and accuracy which was previously impossible. Now you have known all the details about how to use AI image sharpening to fix blurry or out-focus images, why not run your browser, visit AVC.AI and give it a try?
Download Desktop Version of AVC.AI

Syncios D-Savior
Recover all types of data from HDDs, USB drives, SD cards, SSDs, etc. Learn more >>

Photo Enhancer AI
AI Image Upscale, Denoise, Colorize, Sharpen and Calibrate to enhance your photo quality.
AI Online Image and Video Tools
More AI-Powered Products
Tricks and Tips
- Top 8 AI Image Generators No Restrictions in 2026
- How to Blur Video in Canva: 5 Super Easy Steps
- 3 Ways to Fix Out-of-Focus Video: A Step-by-Step Guide
- Top 3 8K Video Players for PC in 2026 [Free & Paid]
- How to Convert Videos from 480P to 1080P
- Snapchat Face Swap: How to Change Face and Its Alternatives
- AI Video Upscaling: An Easy Way to Upscale Video to 1080p or 4K
- Perchance AI Image Generator: Full Review & Best Alternatives
- Topaz Video AI Review 2026: Is It Worth it?
- Free to Upscale SD Video to HD, 4K, and 8K in 2026
- Best 7 AI Hentai Generators in 2026 [Desktop & Online]
- How to Improve Video Quality Online for Free
- Best 5 Online Tools to Turn Pictures Into Coloring Pages For Free
- 10 Best Furry AI Generators to Free Create Fursona Art
- How to Blur the Background in Microsoft Teams on Windows, Mac, iOS and Android
- How to Unblur an Image
- 3 Best Forensic Video Enhancement Software
- 3 Methods to Fix Out of Focus Photo Easily in 2026
- 6 Best AI Photo Restoration Apps to Restore Old Photos
- How to Get Good Video Quality on CapCut Desktop [5 Ways Included]
- Sharpen Blurry Photos Online for Free
More Hot Articles
- 5 Unrestricted AI Image Generators in 2026 [Free]
- Best 4 AI Clothing Removers to Remove and Change Clothes in Photos
- Gramhir.pro AI Photo Generator Review and Its Alternative
- How to Mosaic Face in Videos to Keep Privacy Safe
- 11 Best Free Video Editing Software for Beginners (PC and Mac) in 2026
- How to Blur Background in iPhone Video (6 Practical Methods)
- How to Blur Licence Plate in Video: 5 Methods to Protect Your Privacy